Thinking About Closed-Cell Spray Foam?
Alright, let's talk about closed-cell spray foam. I get a lot of questions about this stuff, and for good reason. It's a fantastic product when used right, but it's not a magic bullet, and it's definitely not a weekend warrior DIY project for most folks. You've probably heard the hype – super high R-value, air sealing, moisture barrier. All true, but there's more to it than that. As a local contractor, I've seen it all, from perfect installs to absolute disasters. So, let's break down what you, as a Spokane homeowner, need to know.
Before You Even Think About Spraying
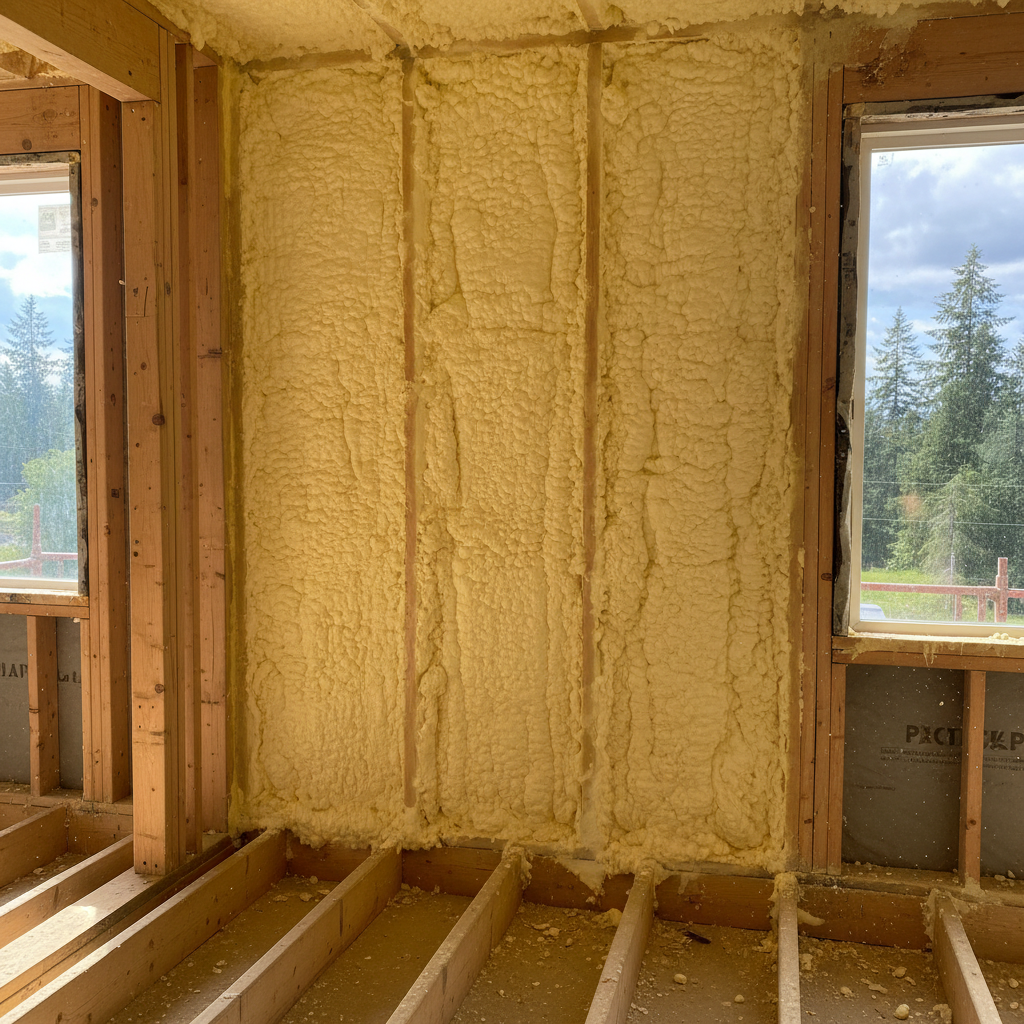
First off, understand what closed-cell spray foam is. It's a dense, rigid foam that expands on contact and cures quickly. It creates an incredible thermal barrier and, critically, an air barrier. This means it stops air leaks dead in their tracks, which is huge for energy efficiency, especially with our cold Spokane winters and hot summers. It also acts as a vapor barrier, which can be a double-edged sword if not handled correctly.
Here's the big question: Can you DIY closed-cell spray foam? The short answer is, technically, yes, you can buy small kits. But should you? Probably not for any significant area. These kits are okay for small repairs, sealing up a few penetrations, or maybe a tiny rim joist section. But for a whole attic, crawl space, or even a full wall cavity? Absolutely not. You're dealing with chemicals that need precise mixing, specific temperatures, and proper safety gear. Mess it up, and you've got a gooey, ineffective, and potentially hazardous mess that's incredibly expensive to remove. Plus, you won't get the R-value or air sealing you're paying for if it's not applied correctly. Trust me, I've had to fix more than a few DIY attempts, and it's always more costly than doing it right the first time.
So, if you're thinking about insulating a larger area, you need to call a professional. That's just the plain truth. We've got the training, the expensive equipment, and the experience to do it safely and effectively. We understand things like substrate prep, proper thickness, and ventilation requirements that are crucial for our specific climate here in Spokane, especially with our clay soils often leading to damp crawl spaces.
During the Installation: What to Expect from the Pros
When you hire a company like Spokane Spray Foam Insulation, here's what the process generally looks like:
- Preparation is Key: Before we even think about spraying, the area needs to be clean, dry, and free of debris. Any old insulation usually has to come out. We'll protect surfaces that shouldn't get foam on them – think windows, pipes, electrical boxes.
- Safety First: This isn't optional. Our crews wear full PPE: respirators, suits, gloves, eye protection. The chemicals involved are no joke when they're being applied. You, your family, and pets will need to vacate the premises during the application and for a specified period afterward, usually 24-48 hours, to allow for off-gassing and proper curing.
- Application: We'll use specialized equipment to mix and spray the two-part foam. It expands rapidly, filling every nook and cranny. This is where the skill comes in – getting the right thickness, ensuring complete coverage, and avoiding over-spraying. For example, in a rim joist application, we're aiming for a consistent, dense layer that seals off the outside air completely.
- Ventilation: Proper ventilation during and after the spray is critical. We'll set up fans to help clear the air.
It's a messy job, but a professional crew knows how to manage it and leave your home clean once the work is done.
After the Foam is Sprayed
Once the foam is cured and you're back in your home, what then?
- Curing Time: The foam will be tack-free pretty quickly, but it continues to cure for a while. That's why we recommend staying out for a day or two.
- Insulation Inspection: A good contractor will walk you through the completed job, showing you what was done. You should see a uniform, rigid layer of foam.
- Energy Savings: This is where you'll really notice the difference. Your home will feel more comfortable, with fewer drafts and more consistent temperatures. You'll likely see a noticeable drop in your energy bills.
- Moisture Management: Because closed-cell foam is a vapor barrier, it's crucial that any potential moisture issues (like leaks) are addressed before installation. If moisture gets trapped behind the foam, it can lead to problems. This is another reason why professional assessment is so important.
- Future Access: Remember, once it's sprayed, it's there. If you need to access wiring or plumbing behind the foam later, it's going to be a job. Plan accordingly and make sure any necessary inspections (electrical, plumbing) are done beforehand.
Closed-cell spray foam is a serious investment, but it's one that pays off in comfort and energy savings when done right. Don't cut corners trying to DIY a big job. Get a few quotes, ask questions, and make sure you're working with experienced pros who know what they're doing. Your Spokane home will thank you for it.